Friday, June 29, 2012

Ring Organization

There's nothing worse than trying to find last minute jewelry as you're walking out the door.  Here's a cute way to display your rings for easy viewing.


What you will need:

  • Container--find the size that works best with the amount of rings you are displaying.
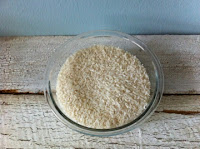
  • Rice--you can use other small dry items such as buttons, lentils, beans, etc.
  • Rings--this works for bobby pins, too!

Fill container with rice.  I fill my containers almost all the way full.  The more rice you use, the easier it is to push in the rings and hold them steady.


Gently push your rings into the rice.
See container ideas below.
Glass Bowl
Ceramic Bowl
Bread Tin
Old Box
Cigar Box
Try this same process with bobby pins!


What will you use to display your rings or bobby pins?  Post your pics!

Thursday, June 28, 2012

Makeup Magnet Frame

Awhile back I found this really great idea on Pinterest to make a magnetic board for my makeup.  (See the orginial idea here.)  I made my own version using a leftover frame I had lying around from a previous craft project.  

What you will need:

  • Picture frame large enough to hold your makeup--I laid out my makeup on top of the frame to see how it would fit.  Choose a larger frame if your makeup won't fit, or only choose the makeup you use on a daily basis to add to your frame.
  • Sheet metal--Any thickness will do.  I used a thin sheet I found at a home improvement store and cut it down to size using tin snips.
  • Tin Snips or Metal Sheers--you can find this at a home improvement store.
  • Fabric--I used a fat quarter for my project.
  • Scissors
  • Tape
  • Magnets--I use the silver colored power craft magnets from Hobby Lobby. (Find them here.)  These work better than the black magnets, which are not as strong.
  • Super Glue--I found this works better than hot glue as it lasts longer and holds stronger. 

How to make a Makeup Magnet Frame:

1.  Cut your sheet metal to fit inside your frame using your tin snips or metal sheers.  I used the paper insert inside my frame as a stencil.  Make sure it fits and cut to adjust.

  
2.  Iron out the wrinkles and cut your fabric to have at least an extra inch of fabric on all sides of the sheet metal.  Lay the sheet of metal in the center of the wrong side of your fabric piece.


3.  Tape all sides of the fabric in towards the center like you are wrapping a present.  It's easier when you tape fabric to metal, not fabric to fabric.  Cut your fabric smaller if you need to.  Make sure to pull the fabric tight--you don't want bunching to happen on the front side.  I taped the top down first, then pulled the bottom up tight.  Repeat with right and left sides.


4.  Place the wrapped sheet metal face down inside your frame.  I put the glass that came with the frame on the backside of the wrapped sheet metal to make the frame tight.  This will also allow you to reuse your frame as a picture frame again later if needed.


5.  Your frame should look like this.  You should be able to touch fabric, not glass.  If the glass has been laid down first, switch it around.


6.  Now it's time to glue your magnets to the back of your makeup.  Using a small amount of super glue, put a dab in the center of the back of your makeup case.  Place the magnet on top of the glue and allow to dry according to package directions.  It is important that you allow the glue to dry.  Don't get giddy and start putting your makeup on the frame.  It will leave glue marks and possibly glue your makeup to the fabric!


Some makeup has an extra piece of paper you can lift off for more information.  Take it from me, you will want to rip off this piece of paper.  Otherwise after awhile, it will rip itself off and your makeup will be hanging from the extra paper.


7.  Once the glue dries, you can start adding your makeup to the frame!  


The fun part about this project is that you can switch out the fabric as often as you like.  You could use scrapbook paper as well, but the fabric allows you to wash it if it gets dirty.  You can hang the frame from the wall to save space on your vanity or sink.  

Post a pic of your makeup magnet frame if you make one!  I'd love to see your project!

Wednesday, June 27, 2012

Coldplay

This post has nothing to do with cleaning, organizing, crafts, weddings or decorating.  But it must be blogged about.  


Last night my husband surprised me with tickets to the Coldplay concert.  What???  Our good friends David and Hope went with us.  David and Taco (my husband) told Hope and I that we were going to an Astros game.  When we neared the stadium, Hope asked if we had tickets to the game.  Taco then proceeded to pull out Coldplay tickets.  


Needless to say, Hope and I were speechless.  Especially when we walked in to get our seats and we entered the "club" section!  Amazing!


My husband, Taco, and I 

We received these crazy wristbands that lit up with the music during the concert.  This is what it looked like with the entire audience lit up.  
How cool is that?


This was such a great experience!  
To watch a short video of Coldplay's Viva La Vida, visit here


 I have the best husband in the world!

Tuesday, June 26, 2012

Microwave Cleaning

We are in the process of moving and getting the house ready for renters. Pinterest has been a useful source of cleaning tips!  In the last week I have cleaned my oven, rid my toilets of their water stains, shined my kitchen sink, and cleaned my microwave!  Here's the process I used to clean my microwave from the Crafty Little Gnome blog:

My microwave before.

Step 1: Fill a microwavable bowl with 2 cups of water and 2 Tablespoons of White Vinegar and place in center of your microwave.
Step 2: Microwave for 4-5 minutes.  I let the water sit for another 5 minutes in the microwave.
Step 3: Use a damp, soft rag to wipe down the inside of the microwave.


My microwave after.


A before and after look inside my microwave!

I couldn't believe how easy it was to clean my microwave using this process!  It took me about 12 minutes start to finish!  

Monday, June 25, 2012

Front Door Clean-up

A few days ago I was inspired to clean up the wood on my front door.  I used Watco's Rejuvenation Oil as recommended by my realtor.  I was pleasantly surprised by the results!
Check out the process below:


Step 1: Wipe down door with mildly soapy water.  Here's my front door before the clean up.


Step 2: Follow directions on bottle to apply oil.  Watco brand says to apply with a soft cloth, then wipe down with a clean soft cloth after 10 minutes.
 Here's my front door after the shine-up.
Front door before and after.

Do you have a more natural way of cleaning up wood?  Share it with me!

Website Development

I have been working on my website for the past two days almost non-stop.  (Check out my website here). Just when I think I'm finished, I come up with another great service I could offer.  First it was the combination of organizing and crafting.  But wait!  I am also a wedding coordinator and reception decorator.  And yes!  Why not add in that I can decorate any space using whatever is available?  That one will have to wait.  In the meantime, check out my website and enjoy the madness!  www.julielynndesign.weebly.com


Sunday, June 24, 2012

I Create. I Organize


I have officially combined my two passions into Julie Lynn Design!  I love to create and I love to organize!  I have been organizing with a good friend of mine for the past two years under a different business name, but an upcoming move is inspiring me to branch out on my own!  If you need help organizing your home, office or classroom, let me know!  Check out more pictures on my website: www.julielynndesign.weebly.com
Craft Room / Office: After


Craft Room / Office: Before